CLC's Pocketship Under Sail

CLC's Pocketship Under Sail

Monday, March 10, 2014

In with the car, out with the boat

I'm hoping weekly updates will inspire me to keep motivated without boring my fans to much. 

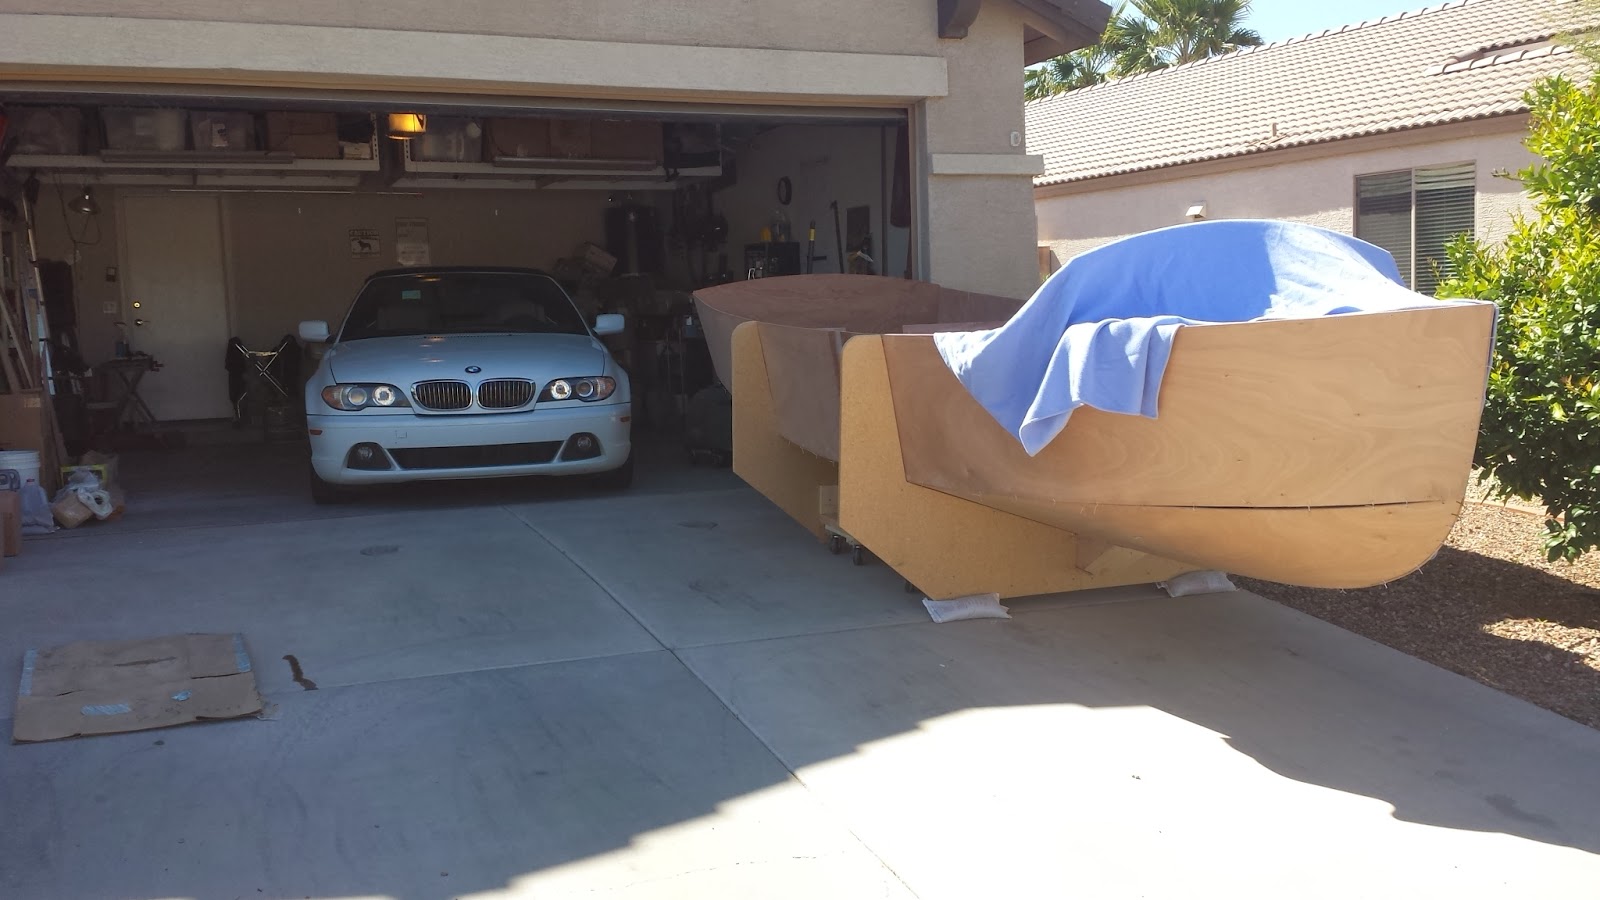
After a whole week of house and pet sitting (9 pets in all) and overdue car maintenance,  it's out with the boat and in with the car. 

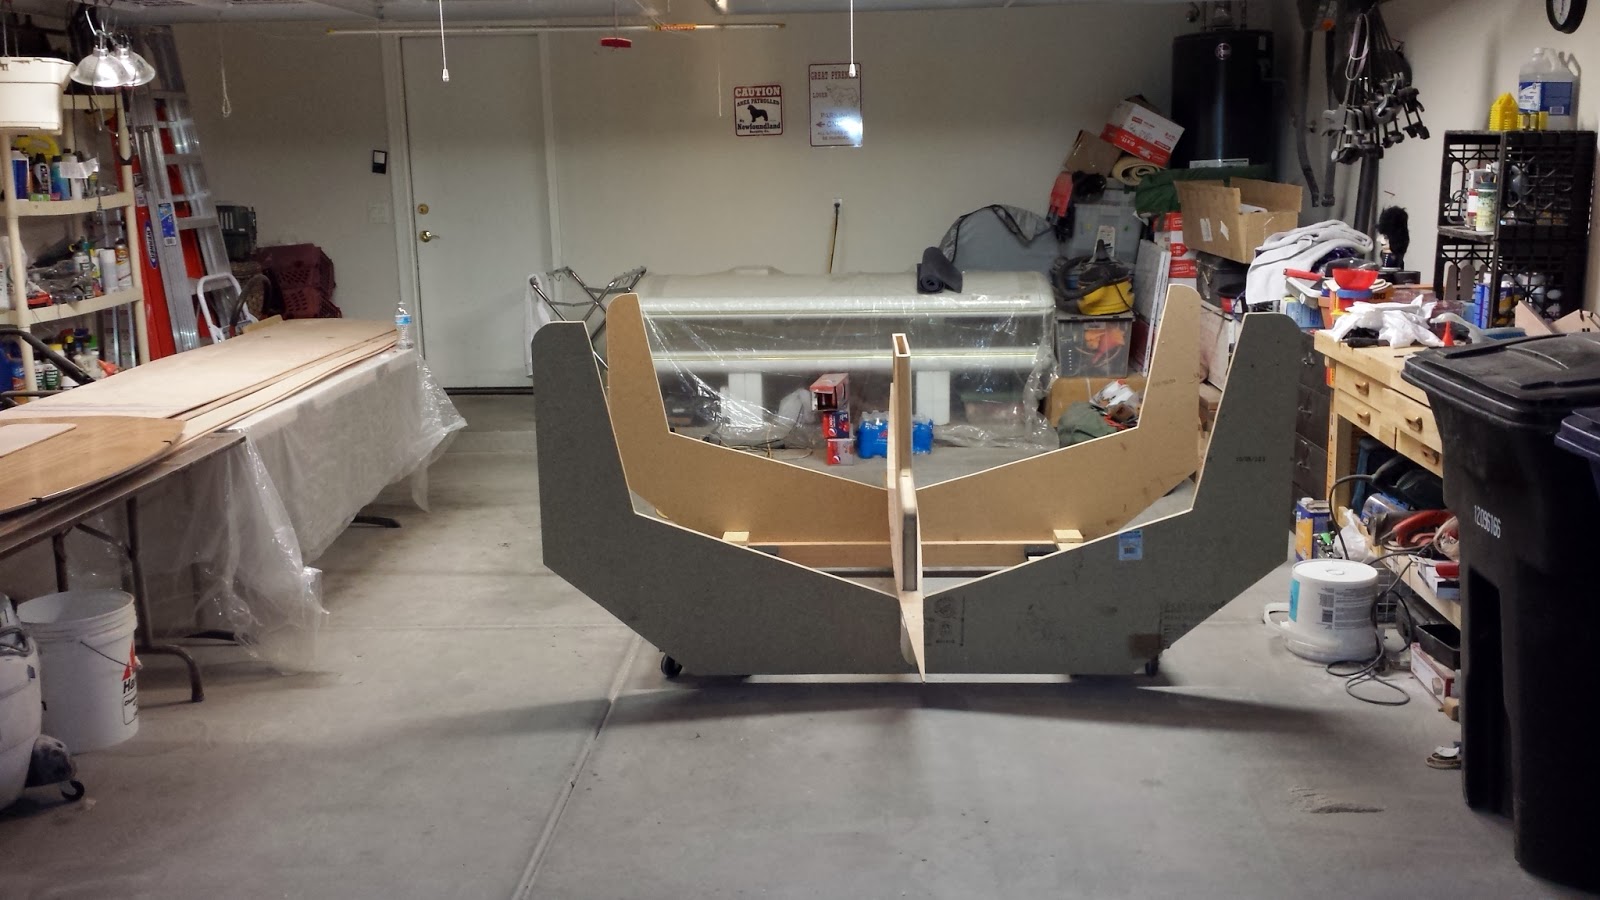
But, with regards to the boat this week, not all (learning) is lost. I thought the boat might be kinda easy getting out of the garage compared to getting it back into the garage. As you can see, the driveway is on an incline. Much to my surprise,  it was just as easy getting it back into the garage. The boat and cradle, at this point are only about 200 lbs. That and the fact I mounted 8 wheels under the cradle made it a breeze. What you see under the front of the cradle are a couple of my lead ballast bags used as wheel chocks. I also threw some blankets on her to protect her from the brutal Az UV rays (the back half of the boat is in the shade).

Tuesday, March 4, 2014

More Hull & Bulkheads

Weekly update (starting now lol).
This step (stitching in bulkheads) is on p.67. If you read far enough ahead (p.83, but is first pictured on p.72), a temporary lower-breast-hook needs to be installed between now and the glassing stage (future builders take note). I will remove the actual lower-breast-hook right before fiberglassing this area.
Also, notice I added a bit of plywood vertically behind bulkhead 2. That's where the wiring will be tied down later.

I added the cleat on bulkhead 2 at this point because so many people were having problems here when attaching it earlier. However, I have my own challenge: the R.Bottom Hull is bulging upwards about 1" at Floor#3. When I put my weight on it, it drops that floor even with the rest. I hope as construction continues, that will pop into place. Just in case, I plan to add some weight there during filleting and glassing and hope it holds. I guess that's why not too many people build wooden boats in the VERY DRY Arizona desert (this stuff is warping, but the overall construction should iron most of it out). 

Monday, February 24, 2014

Hull & bulkheads

Hmmm, for some reason the 18 gauge wire isn't holding up. So I used some hanger wire on the 2 holes on the end. Now it's yielding. Time to get more wire already and guess what I learned while at the hardware store? The reason my wire was breaking was because I grabbed the "aluminum" wire instead of the "steel" wire. That explains a lot.
Time to install floor (support) #4. Looks about 5" inches too high.

Love those bar clamps (not the one on the stem). Just long enough. Floor #4 down.
Now it's starting to look like a boat in here.

Nobody's sharing any Indian tricks how you get back in here (without breaking any ply or wires) to install the floors (bulkheads) so I will. Lay down some ply big enough to distribute your weight. Then proceed gingerly. Not easy to see but there's a 10"x36" piece of ply over the rear Keelson to help distribute my weight so I can install the floors/bulkheads.

Until you do this, you have no idea the tremendous amount of tension going here. Don't worry, those gaps will close as the bulkheads are installed.

Just take it in.
I just wanted to add a visual aid to show where the strong areas are to get started. The rectangle at the stern is a piece of ply laid down to distribute my weight as I go in and out of the hull. At this point, I'm holding off on the transom install. After Floor 4, add Floor 3, then 5 and 6. Now you can lay a board on top of those and move around a lot easier to do the rest. But make sure most of your weight is on Floors 3 & 4. Floors 5 & 6 want to pivot down if you put too much weight on these two. Also, the areas at Bulkheads 4 & 7 are directly over the cradle (lots of support at these areas).  Don't let the creaking and moaning bother you. One wire stitch isn't that strong but there's about 200 stitches working together here. Once the fillet "tack welds" are in (I hear), that goes away.

Friday, February 21, 2014

Preparation, Preparation, Preparation...

Enough preparation! You have no idea how much time & work is involved with fiberglassing, epoxying, curing (waiting, waiting, waiting), more epoxying, sanding, sanding, and more sanding goes into this project until you actually do it! Holy crap!

I tried to do as much as I could before hull assembly while I had the space. Now it's time. 

1
2
3
I Never completely understood why the rear keel had to be blocked up. Leveling? Not so much (exactly). There's 100-lbs of lead back there.

Wednesday, January 8, 2014

Hull Prep: Floors, Bulkheads & Glass Upper Hull

After a couple weeks on this phase, I've decided (while I have the space) to continue prepping all of the big pieces that I can before assembling the hull. Once the cradle and hull are up, it's gonna get a little cramped in Ye Ol Boatyard. 
Inside upper hull fiberglassing.
Floors with chines being epoxied.
Top: glassed, not sanded. You can see the weave projecting through 3 coats of epoxy.
Bottom: glassed & sanded.
Mid Hull: Fiberglass layout.
Bulkheads: epoxy coating before hull assembly.
Background: new centerboard (yes, itsa do over).