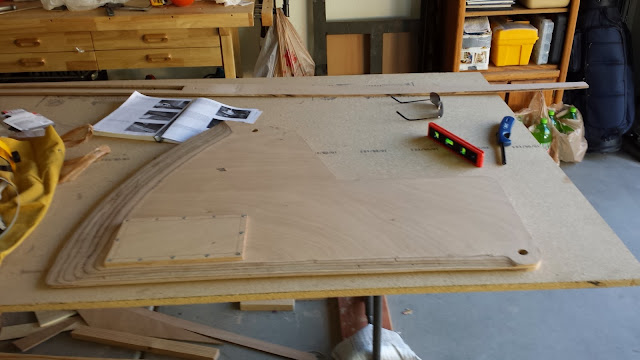
Centerboard fabricated and ready for lead-pour.
Notes: while rabbeting the ballast, don't forget (as I did) to rabbet the leading and trailing edges before glue-up (not later with table saw; router would be much easier). I will make up for it by double-up with fiberglass overlays (I hope) next. I also drilled out pivet holes and screw holes to be filled in later with epoxy along with the screw holes from the ballast lead backing (you see here).
 |
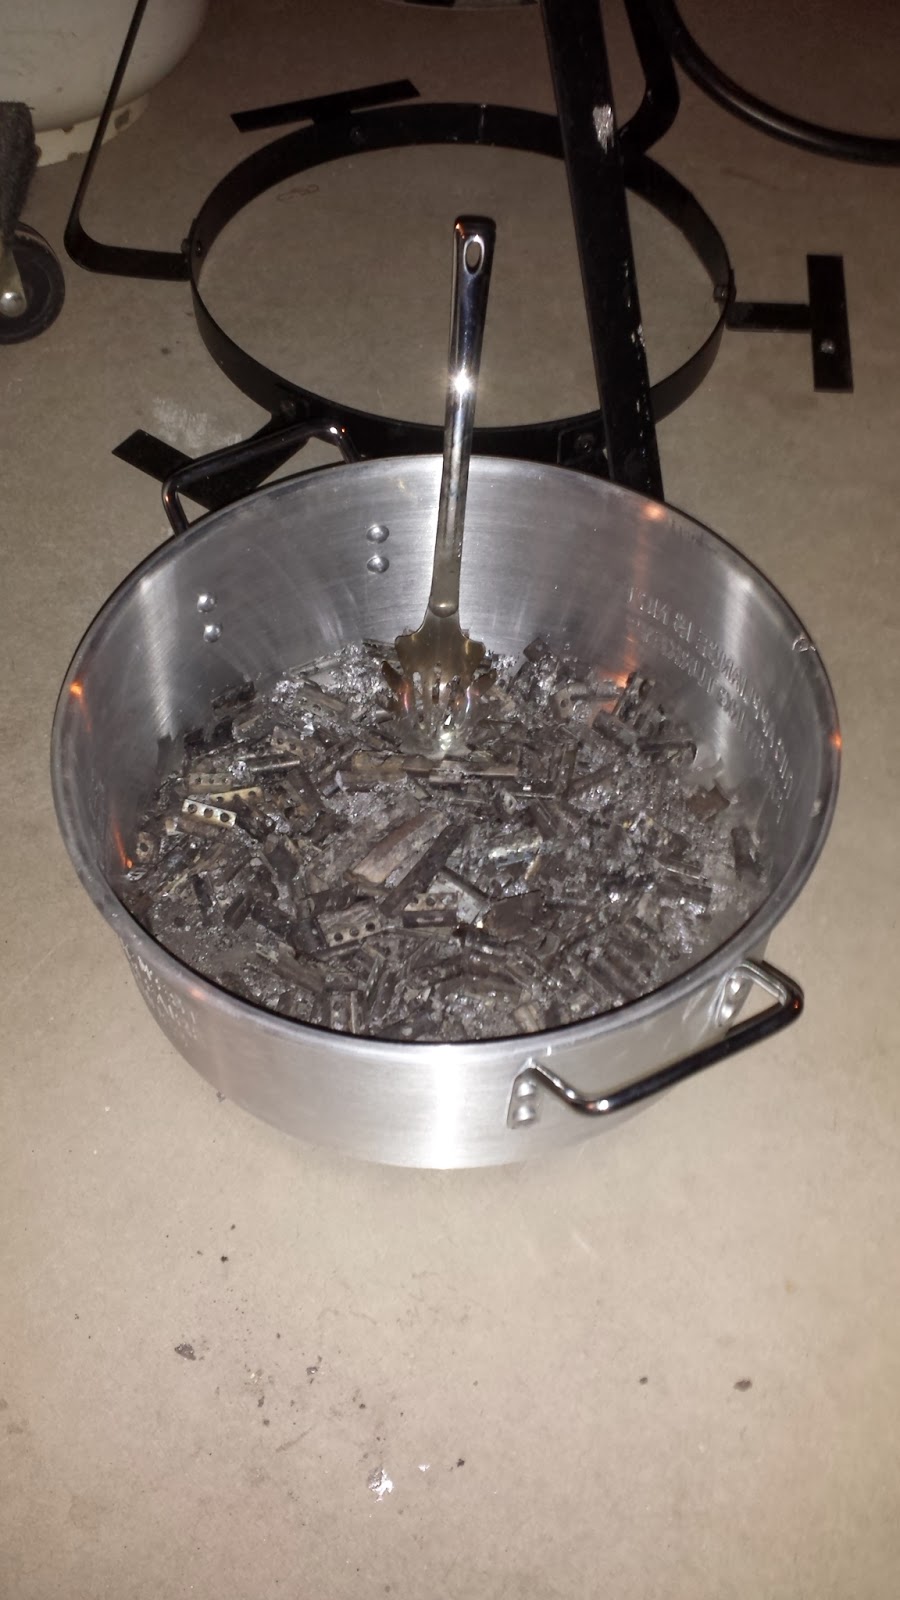
All prepped and ready to go for smelting.
Notes:
Smelter is actually a turkey baster I bought last Black Friday for only $40.
The lead weights I got (mostly for free) from local Mexican tire shops.
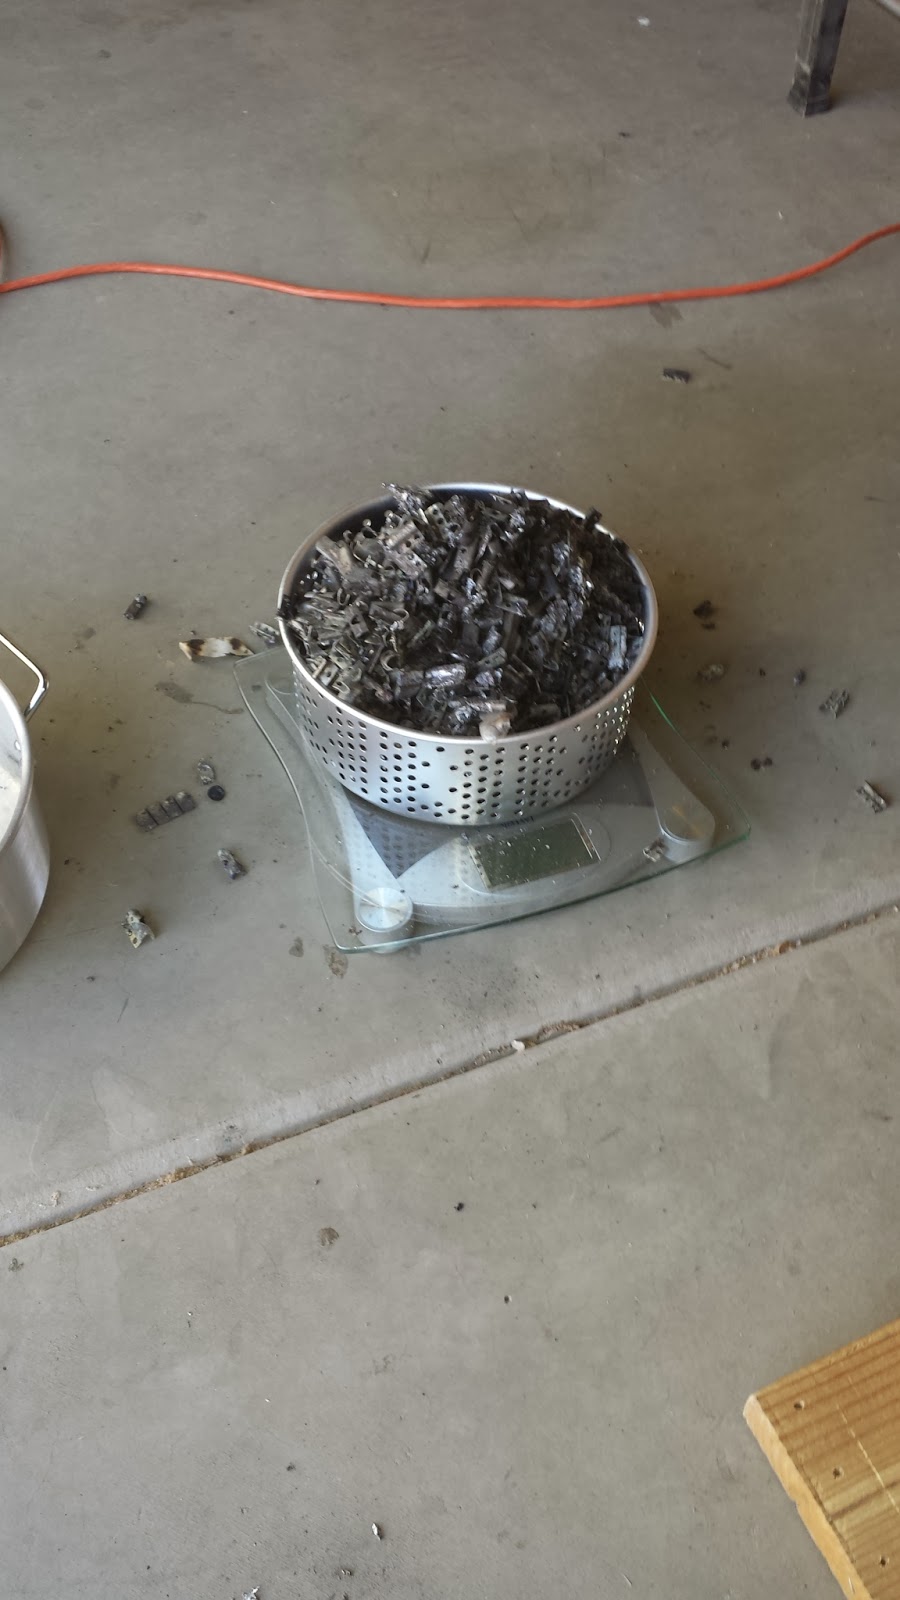
Instead of manually sifting out non-lead pieces, I just threw everything in the smelter and scooped them out with a steel strainer spoon (easy peazy).
Propane tank: borrowed from girlfriend and filled at Shell for a $1 less/gal than every place else (pays to shop around).
Lead buckets can be heavy; cheap furniture dollies from Harbor Freight come in handy.
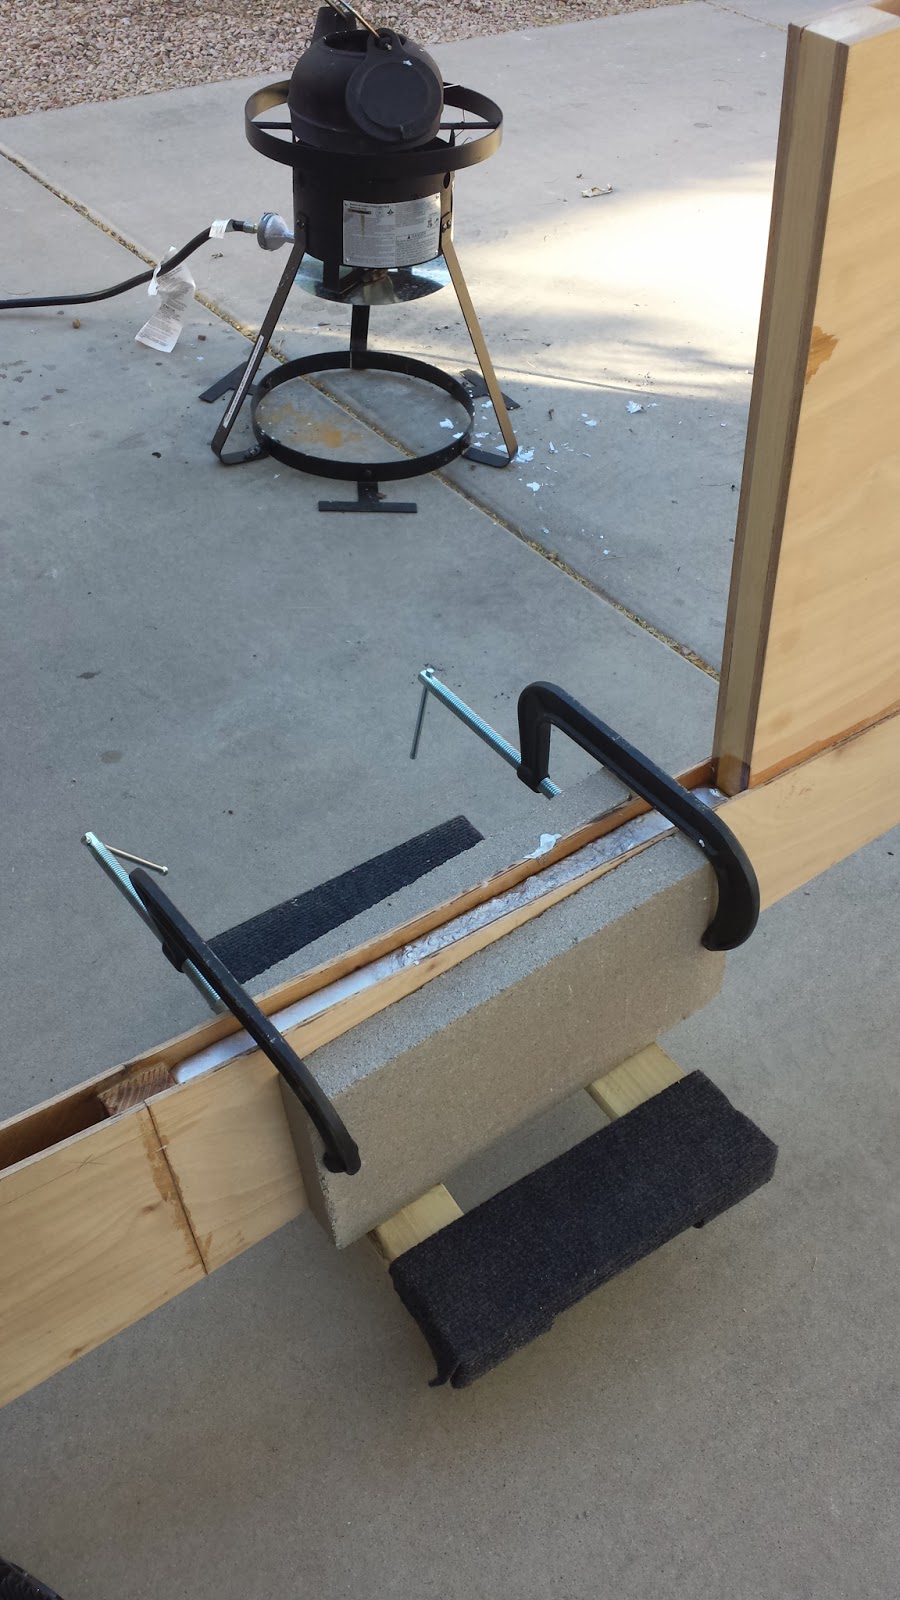
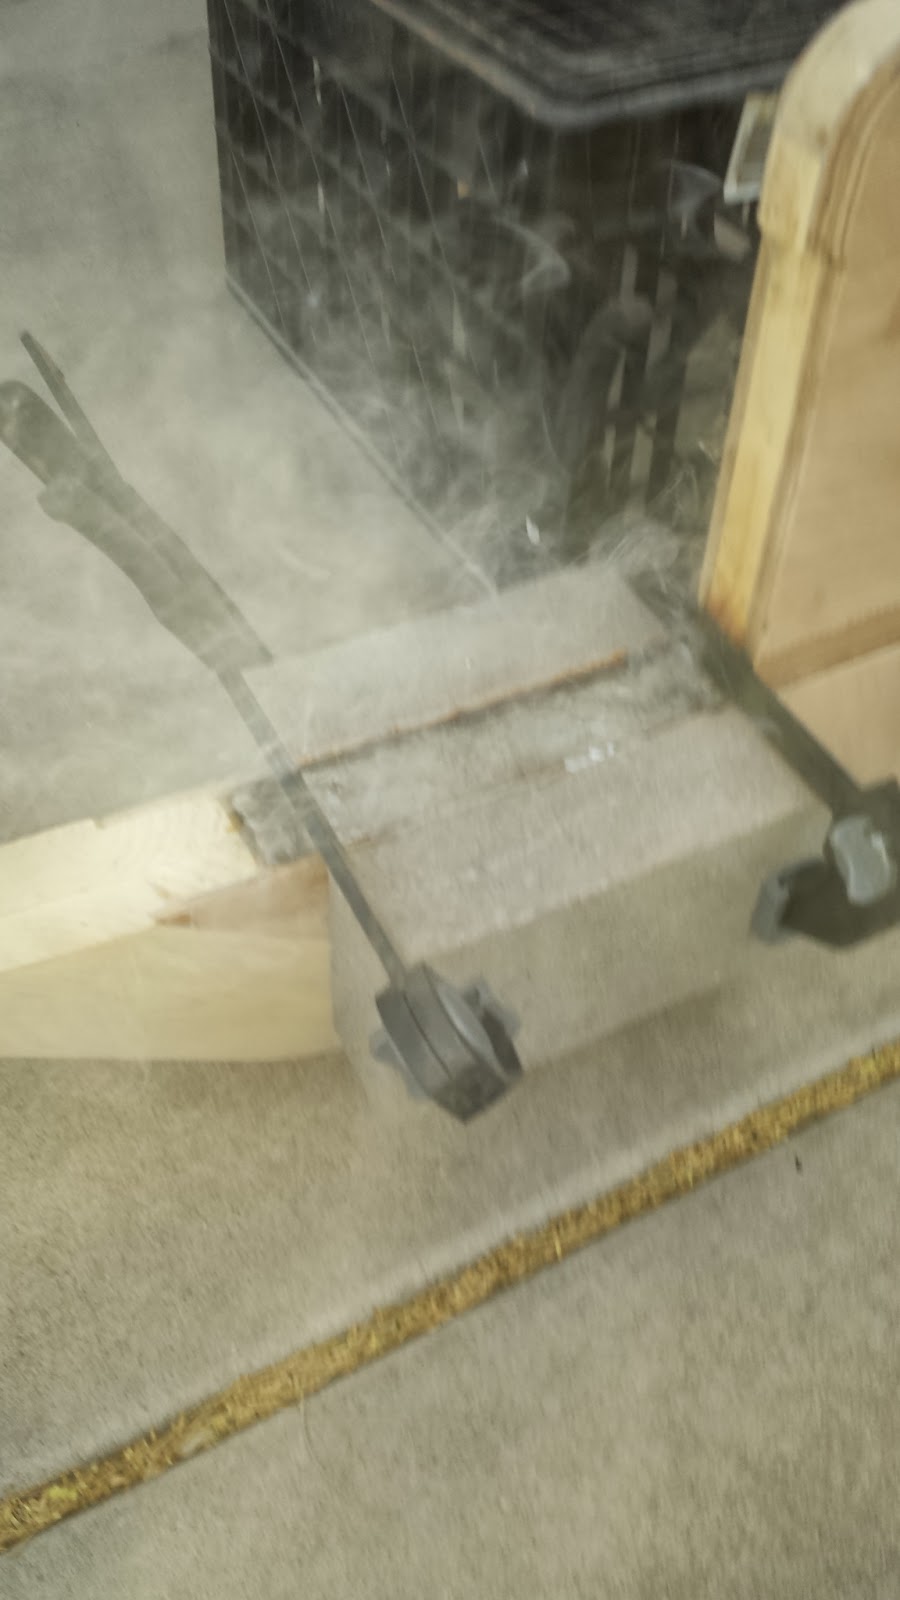
When filling keel, fill one end, and let cool, before filling the other end. The bow needs to be elevated to level the rear ballast before pouring there (that's what the milk crate is for). |
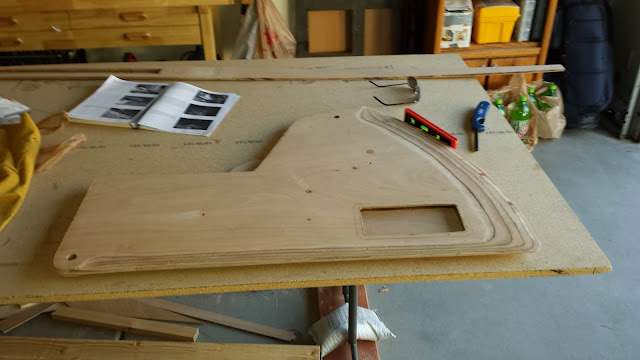 |
| The opening for lead ballast. |
 |
| Yeah, lots of smoke here. This continued to boil at least 10 more minutes after the pour (I was worried if there would be any wood left; why epoxy inside here when it all gets burned up I don't know, but I'm not the expert). |
 |
| Notice the stainless strainer I used to scoop out all the non-lead material. All this from just the little bit I just poured into the bow and centerboard (rear keel later). |


